In an era where peace of mind is priceless, ensuring the safety of your home and loved ones is a top priority. However, the high costs and restrictive contracts associated with professional security services can be a significant barrier for many. This is where the power of self-reliance and modern technology comes into play. Building your own security system is no longer a complex endeavor reserved for tech wizards; it's an accessible, affordable, and incredibly rewarding project for any homeowner. This guide is packed with top-tier DIY home security system ideas that empower you to take control, customize your defenses, and build a robust shield around your sanctuary, often using tools and technology you already own.
The Foundation: Understanding DIY Home Security Components
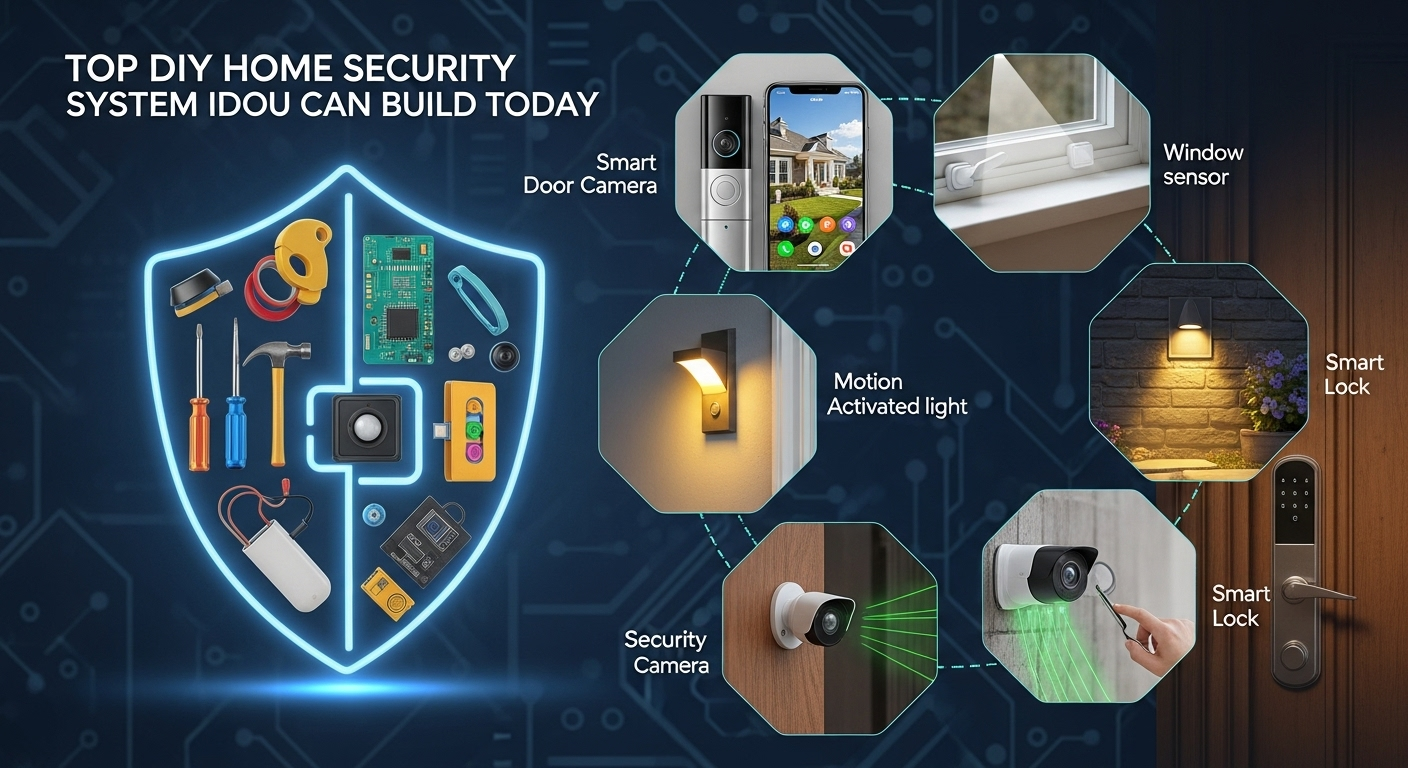
Before you can build a house, you need to understand the bricks and mortar. Similarly, before constructing your own security system, it's crucial to grasp the fundamental components that work together to create a cohesive defense network. These building blocks are the senses of your system—the eyes, ears, and nerves that detect and report potential threats. Understanding their function is the first step toward designing a system that is perfectly tailored to your property's unique layout and your personal security needs.
Each component serves a specific purpose, from detecting an unauthorized entry to alerting you and deterring the intruder. What makes a DIY approach so powerful is the ability to mix and match these components based on your budget and technical comfort level. You can start with a simple sensor and gradually expand to a multi-camera, fully automated network. This modularity ensures that your home security can grow and adapt with you, without being locked into a single brand's ecosystem or expensive upgrade path.
The true beauty of a DIY setup is its inherent flexibility. You're not just a consumer; you become the architect of your own safety. This hands-on approach allows you to place sensors in the exact spots you deem most vulnerable, angle cameras for the perfect field of view, and decide precisely how your system should react to a trigger event. Whether it's a silent notification to your phone or a blaring siren, the control is entirely in your hands.
- #### Sensors: The Nerves of Your System
Sensors are the frontline soldiers of any security setup. The two most common types are contact sensors and motion sensors. Contact sensors, also known as entry sensors, typically come in two parts that create a magnetic circuit. You place one part on a door or window and the other on the frame. When the door or window is opened, the circuit is broken, and a signal is sent to your system’s hub. They are incredibly reliable for securing all potential points of entry.
Motion sensors, on the other hand, guard open spaces. Most DIY-friendly models use PIR (Passive Infrared) technology to detect the heat signature of a person moving within their range. They are ideal for covering large areas like living rooms, hallways, or basements. When placing motion sensors, it's important to consider factors that could cause false alarms, such as pets, heating vents, or direct sunlight. Modern smart sensors often have pet-immunity features to address this very issue.
- #### Security Cameras: The All-Seeing Eyes
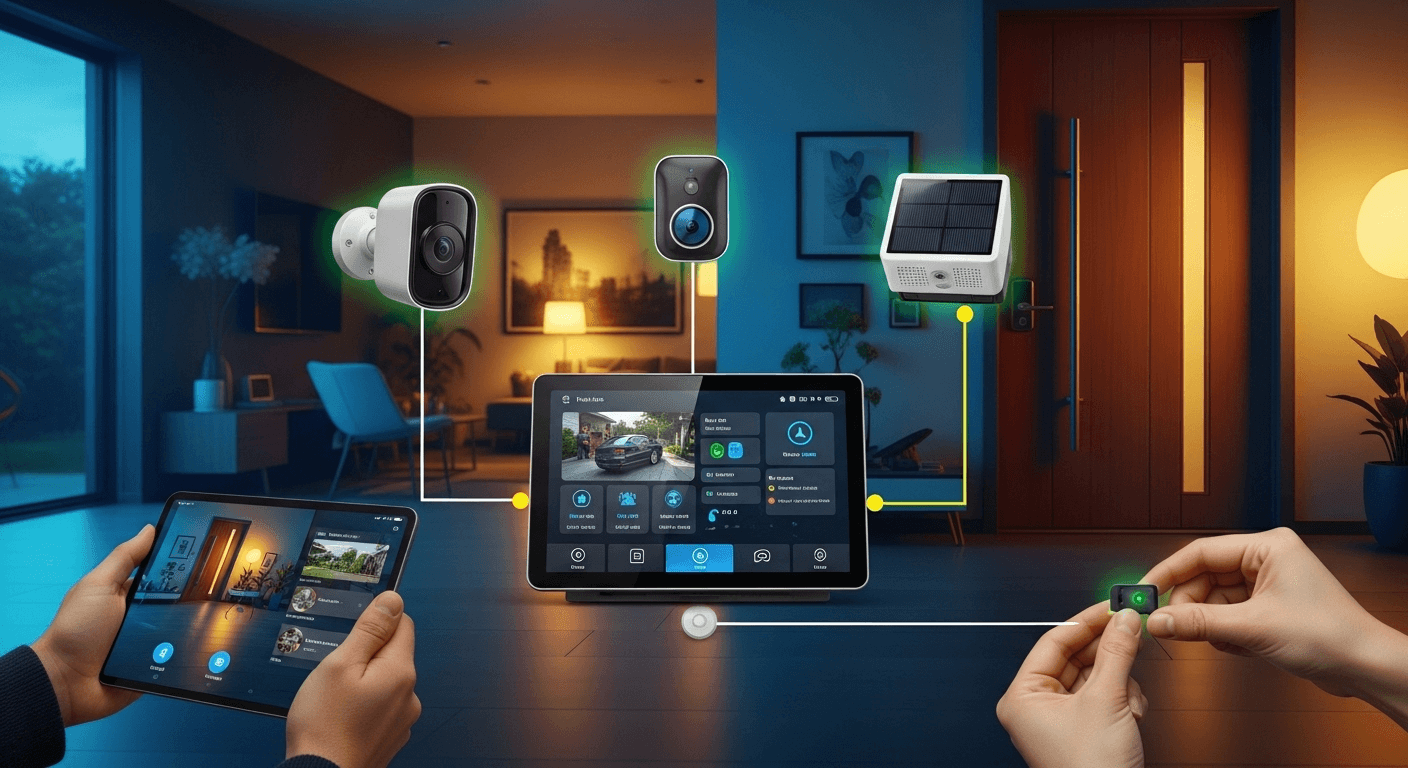
A picture is worth a thousand words, especially when it comes to identifying an intruder. DIY security cameras have become incredibly affordable and feature-rich. You can choose from Wi-Fi IP cameras that connect directly to your network, or you can repurpose old devices like smartphones and webcams (more on that later). Key features to look for include 1080p resolution or higher, night vision capabilities, a wide field of view, and two-way audio, which allows you to hear and speak through the camera.
The placement of your cameras is a strategic decision. Visible cameras can act as a powerful deterrent, signaling to potential burglars that your home is monitored. These should be placed near primary entry points like the front door and back door. Hidden or discreet cameras can be used to capture footage without alerting the subject, which can be useful for monitoring activity inside the home. Always be sure to comply with local laws and regulations regarding video and audio recording.
- #### Alarms and Sirens: The Warning Call
Detection is only half the battle; an effective response is what truly deters a threat. This is where alarms and sirens come in. A loud, piercing siren (often 100 decibels or more) is designed to do two things: startle and disorient the intruder, causing them to flee, and alert your neighbors to the disturbance. Many DIY systems allow you to link your sensors directly to a siren, which will sound automatically upon a breach.
However, not every situation calls for a loud alarm. The beauty of a DIY system is the ability to customize your alerts. You can configure your system to send a silent "push" notification directly to your smartphone instead. This allows you to discreetly check your camera feeds and assess the situation without alerting the intruder to your awareness. For many, a hybrid approach is best: a silent notification for a sensor trip at a low-risk window, but an immediate siren for a forced entry at the front door.
Low-Tech, High-Impact DIY Security Solutions
You don't need to be a technology expert or have a large budget to significantly improve your home's security. Some of the most effective deterrents are simple, low-tech, and based on common-sense principles. These foundational measures are designed to make your home a "hard target"—a property that looks too difficult or risky for a potential burglar to attempt. Many intruders are opportunists looking for an easy score, and these simple upgrades can be enough to make them move on to an easier target.
These strategies focus on reinforcing the physical and psychological barriers of your home. A strong door, a well-lit yard, and the impression of a sophisticated security system can be just as effective as the real thing in many scenarios. By implementing these ideas, you create layers of defense. Even if you plan to install a high-tech system later, starting with these basics is an essential and cost-effective first step.
Remember, security is about layers. A single lock or a single camera can be defeated. But when you combine a reinforced door, motion-activated lights, and visible camera decoys, you create a multi-layered defense that presents a much more formidable challenge. These low-tech solutions work in concert to make your home less appealing to criminals from the moment they see it.
- #### Reinforcing Entry Points
Your doors and windows are the most common points of forced entry. Start by inspecting your exterior doors. The strike plate—the metal plate on the doorframe where the lock’s bolt enters—is often secured with short, half-inch screws. Replace these with 3-inch screws that go deep into the wall stud behind the frame. This simple, 5-minute upgrade dramatically increases the door’s resistance to being kicked in. For added protection, install a heavy-duty deadbolt with a one-inch throw.
For windows, especially on the ground floor, consider applying a security film. This transparent polyester film strengthens the glass, making it much more difficult to shatter. Even if an intruder manages to break the glass, the film holds the shards together, delaying or preventing entry. For sliding glass doors, a simple security bar placed in the track is a cheap and highly effective way to prevent them from being forced open.
- #### The Power of Light and Deception
Burglars love the dark. A well-lit property is a major deterrent. Install motion-activated floodlights over your driveway, backyard, and any dark corners of your property. The sudden burst of light is not only startling but also makes the intruder feel exposed. For an eco-friendly option, solar-powered versions are widely available and require no wiring. Inside, use simple plug-in timers to turn lights and even a radio on and off at random intervals when you’re away, creating the illusion that someone is home.
Deception can be a powerful tool. A convincing dummy security camera, complete with a flashing red LED light, can be purchased for a fraction of the cost of a real one. Place these in highly visible locations. Additionally, simply placing a "This Property is Protected by 24-Hour Video Surveillance" sign near your entryway can be enough to deter an opportunistic thief. These small psychological tricks contribute to the overall impression that your home is not an easy target.
Repurposing Old Tech: The Smart and Sustainable Approach
In today's fast-paced world of technology, many of us have a drawer filled with old gadgets—smartphones with cracked screens, outdated laptops, or webcams from a decade ago. Instead of letting them gather dust or contribute to electronic waste, you can give them a new life as powerful components of your DIY home security system. This approach is not only incredibly cost-effective but also environmentally friendly, making it a win-win for your wallet and the planet.
The core idea is to leverage the advanced technology already built into these devices. An old smartphone, for example, has a high-quality camera, a processor, Wi-Fi connectivity, and a built-in battery backup—everything you need for a basic security camera. With the help of specialized apps, you can transform these forgotten devices into vigilant sentinels for your home in just a few minutes.
This method is perfect for beginners as it requires minimal technical skill and almost no upfront investment. It's an excellent way to dip your toes into the world of smart home security, allowing you to set up cameras in multiple rooms to monitor pets, check on your kids, or simply keep an eye on things while you're away, all without spending a dime on new hardware.
- #### Transforming an Old Smartphone into a Security Camera
This is one of the most popular and easiest DIY security projects. All you need is a spare smartphone or tablet (either Android or iOS) and a Wi-Fi connection. The process is simple: install a security camera app on both your old device (which will act as the camera) and your current phone (which will be your viewing monitor). Popular and reliable apps like AlfredCamera or Manything guide you through the setup process in minutes.
Once the app is installed, simply place the old phone in a location you want to monitor. Make sure it's connected to a power source to keep it running 24/7. These apps offer a surprising number of features, often including live streaming, motion detection alerts, cloud storage for recordings, and even two-way audio. You can have a fully functional motion-activated security camera network up and running for free. For a more professional setup, you can purchase a cheap gooseneck phone holder to easily mount it anywhere.
- #### Using an Old Laptop or Webcam
An old laptop with a built-in webcam or a standalone USB webcam can also be repurposed as a security monitor. Software like Yawcam (for Windows) or iSpy are powerful, free applications that can turn your PC and connected camera into a sophisticated surveillance system. These programs can be configured to start recording or take snapshots when they detect motion and can even upload the footage to a server or send you an email alert.
The advantage of using a laptop is its larger storage capacity for saving video footage locally. You can set it up in a corner of your living room or overlooking a back entrance. If you use a laptop, you also benefit from its built-in battery, which acts as an uninterruptible power supply (UPS) in case of a power outage. This ensures your camera keeps running even if the power is cut, providing an extra layer of security that many off-the-shelf cameras lack.
The Hobbyist's Playground: Raspberry Pi and Arduino Projects
For those who enjoy tinkering and want a truly custom solution, the world of single-board computers and microcontrollers opens up a universe of possibilities. Devices like the Raspberry Pi and Arduino are the heart of countless advanced DIY projects. They are low-cost, powerful, and backed by massive online communities, meaning you'll never be short of tutorials and support. Building a security system with these tools allows for unparalleled customization, far beyond what any commercial product can offer.
A Raspberry Pi is a credit-card-sized computer that can run a full Linux operating system. This makes it perfect for acting as the central "brain" of your security system, managing cameras, sensors, and notifications. An Arduino, on the other hand, is a microcontroller, which is simpler and excels at reading inputs from sensors (like a motion detector or a laser tripwire) and triggering an output (like an alarm or a light). Often, they are used together for a highly sophisticated system.
While this approach requires more time and a willingness to learn some basic coding and electronics, the results are incredibly rewarding. You can build a system that does exactly what you want it to do, from sending a custom notification to your phone with a picture of the event, to integrating with other smart home devices in unique ways. This is the ultimate path for the DIY enthusiast who wants total control.
- #### Building a Custom Raspberry Pi Security Camera
A Raspberry Pi, combined with its official camera module or a USB webcam, can be turned into a high-definition, network-connected security camera. The most popular way to do this is by installing a free, open-source software package called MotionEyeOS. This software turns your Raspberry Pi into a dedicated video surveillance hub with a simple web-based interface.
With MotionEyeOS, you can view your camera feed from any device on your network, configure highly sensitive motion detection zones, and set up notifications via email or other services. It can save recordings to a network drive, an attached USB stick, or even a cloud service like Google Drive or Dropbox. You can build multiple Pi-based cameras and manage them all from a single interface, creating a powerful, scalable, and completely private surveillance system where you control your own data.
- #### Creating a Smart Sensor Network with Arduino
If a Raspberry Pi is the brain, Arduino is the nervous system. An Arduino board is perfect for connecting various types of sensors and creating custom triggers. For example, you can connect an inexpensive PIR motion sensor to an Arduino and program it to send a signal to your Raspberry Pi hub whenever motion is detected. You can even get more creative.
Imagine a laser tripwire across a hallway using a laser diode and a photoresistor connected to an Arduino. Or a pressure-sensitive mat under a doormat that triggers an alert. You could connect a vibration sensor to a window, which would detect the impact of an attempted break-in before the window is even shattered. The Arduino can then be programmed to activate a siren, turn on lights via a relay switch, or send a signal to the Pi for more complex actions. The only limit is your imagination.
Comparing DIY Security Approaches
Choosing the right DIY path depends on your budget, time, and technical skills. The table below provides a comparison of the different approaches discussed to help you decide which is the best fit for your needs.
| Approach | Estimated Cost (Initial) | Complexity / Skill Level | Key Advantages |
|---|---|---|---|
| Low-Tech Reinforcements | $20 – $100 | Beginner | Very low cost, high impact on deterrence, no technical skill needed. |
| Repurposing Old Tech | $0 – $20 | Beginner | Essentially free, quick to set up, good for indoor monitoring. |
| Raspberry Pi / Arduino | $50 – $200+ | Intermediate / Advanced | Maximum customization, full data privacy, highly scalable and powerful. |
| Pre-Packaged DIY Kits | $200 – $600+ | Beginner / Intermediate | Easy to install, polished user experience, optional professional monitoring. |
FAQ: Your DIY Home Security Questions Answered
Q: Are DIY home security systems as reliable as professionally installed ones?
A: A well-planned and properly installed DIY system can be just as, if not more, reliable than many professional systems. The reliability depends on the quality of the components you choose and the stability of your home's Wi-Fi network. The key advantage of DIY is that you have a deep understanding of your own system, making you better equipped to troubleshoot any issues that arise. Professional systems often come with the benefit of professional monitoring and dedicated customer support, which is a trade-off to consider.
Q: How much money can I realistically save with a DIY system?
A: The savings can be substantial. A basic professional installation can cost several hundred dollars upfront, followed by monthly monitoring fees ranging from $20 to $60 or more. Over three years, that can add up to over $2,000. A very capable DIY system can be built for under $300 with zero monthly fees. If you repurpose old tech, your initial cost could be close to zero. The long-term savings are the biggest financial benefit of the DIY route.
Q: Do I need coding or advanced technical skills to build a DIY system?
A: Not at all! The beauty of modern DIY security is its accessibility. Approaches like repurposing an old smartphone or using low-tech reinforcements require absolutely no coding. Even many pre-packaged DIY kits from brands like Ring or SimpliSafe are designed for "plug-and-play" installation. The more advanced projects, like those using Raspberry Pi and Arduino, do have a steeper learning curve but are supported by vast online communities with step-by-step tutorials that guide you through the process. You can choose a project that matches your current skill level.
Q: What about 24/7 professional monitoring? Can I get that with a DIY system?
A: Yes, you can have the best of both worlds. Many companies that sell pre-packaged DIY kits (often called "DIY in a box") offer optional professional monitoring services for a monthly fee, which is often cheaper than the fees from traditional security companies. This gives you the flexibility to self-monitor your system for free, and then add professional monitoring if you're going on vacation or simply want the extra peace of mind. For fully custom builds (like Raspberry Pi), professional monitoring is not typically an option; you are responsible for monitoring your own alerts.
Conclusion
Taking charge of your home's security is one of the most empowering projects a homeowner can undertake. As we've explored, the path to a safer home doesn't have to be paved with expensive contracts and proprietary hardware. From simple, low-tech fortifications to sophisticated, custom-built networks, there is a DIY home security solution for every budget and skill level. The journey begins with understanding the fundamental components and assessing your home's unique vulnerabilities.
Whether you start by simply reinforcing your doors and repurposing an old smartphone, or you dive headfirst into the world of Raspberry Pi and custom sensors, every step you take adds another valuable layer of protection. The ultimate benefit of a DIY approach goes beyond the significant cost savings; it lies in the knowledge, control, and peace of mind that come from building a system tailored perfectly to your life. The technology is accessible, the community support is vast, and the time to start building your safer home is today.
***
Article Summary
This comprehensive guide offers a deep dive into the world of Do-It-Yourself (DIY) home security, presenting a range of actionable ideas for every homeowner. It establishes that building a robust and customized security system is an accessible and affordable alternative to costly professional services. The article explores solutions for all skill levels, starting with foundational, low-tech strategies like reinforcing entry points and using lighting as a deterrent. It then progresses to clever, sustainable methods for repurposing old technology, such as turning old smartphones and laptops into fully functional security cameras with free software.
For the more technically inclined, the guide details advanced projects using Raspberry Pi and Arduino to create highly customizable and private surveillance networks and sensor systems. It includes a comparative table breaking down different DIY approaches by cost, complexity, and key advantages, helping readers choose the right path for their needs. The article is rounded out with a practical FAQ section that addresses common concerns about reliability, cost savings, and professional monitoring, ultimately empowering readers with the confidence and knowledge to begin securing their homes on their own terms.