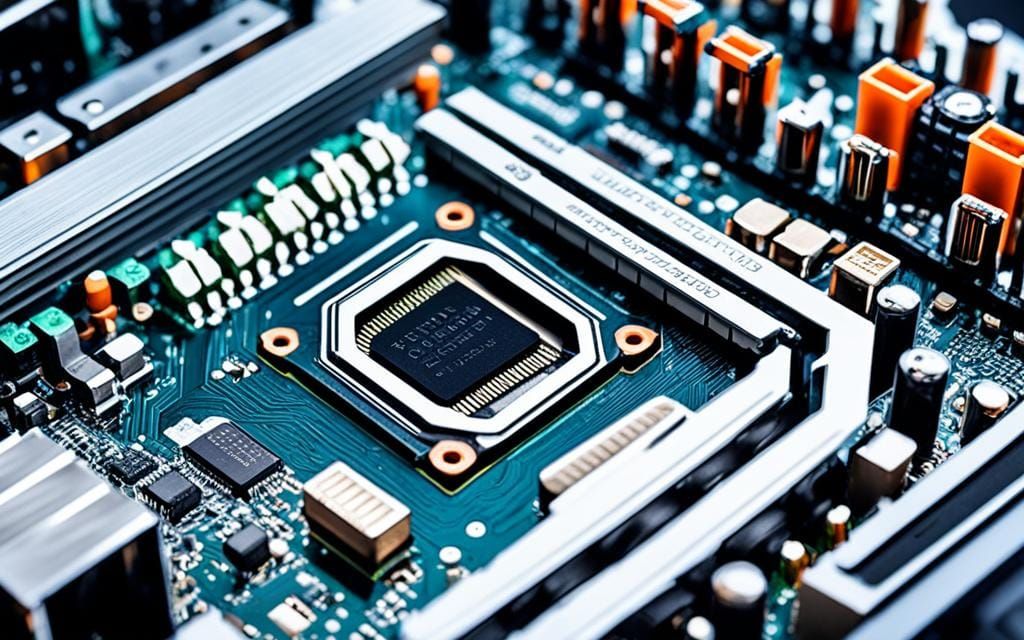
How to Update BIOS on Gigabyte Motherboard? We know how important it is to keep your Gigabyte motherboard’s BIOS up-to-date. An old BIOS can cause problems like not working well with other parts, lower performance, and even make your computer crash. Luckily, updating your Gigabyte motherboard’s BIOS is pretty straightforward, even for beginners.
This guide will show you, step by step, how to update your Gigabyte motherboard’s BIOS. It doesn’t matter if you’re fixing a specific issue or just making sure everything runs smoothly.
You’ll gain the knowledge and confidence to update the BIOS yourself. Let’s start and learn how to update your Gigabyte motherboard’s BIOS.
Introduction
Keeping your Gigabyte computer in top shape is key. Updating the BIOS regularly is a vital step. BIOS is the firmware controlling your motherboard’s basic functions. By keeping it up-to-date, you get many benefits. These can make your computer work better.
Why Update the BIOS on Your Gigabyte Motherboard?
Updating your Gigabyte motherboard’s BIOS brings major pluses. It can make your system work better and be more dependable. There are several important reasons to update your BIOS.
- Improved hardware compatibility is vital. As new hardware comes out, BIOS updates make sure it works well. They ensure the best performance.
- BIOS updates fix bugs and boost performance. They can solve any known issues. This makes your system more stable and faster.
- Adding support for new technologies is another advantage. Updating the BIOS lets you use the latest tech. This includes faster memory, better power management, and more security features.
- System reliability can significantly improve. A well-kept BIOS reduces crashes and freezes. Your computer becomes more reliable.
Updating the BIOS on your Gigabyte motherboard has big benefits. It improves hardware compatibility, boosts performance, and makes your system more reliable. This all makes your computing experience smoother and more enjoyable.
Prerequisites
First, make sure you have everything you need to update your GIGABYTE motherboard’s BIOS. This way, the whole update process will be easier and trouble-free.
Tools and Materials Needed
- A USB flash drive formatted to FAT32
- The latest BIOS version for your specific GIGABYTE motherboard model, downloaded from the official GIGABYTE website
- Access to the BIOS menu on your GIGABYTE motherboard, typically accessed by pressing the “Delete”, “F2”, or “F10” key during boot
Get all the requirements for updating gigabyte bios and items needed to flash bios on gigabyte ready. This avoids problems and ensures your BIOS update goes well. Keep what do i need to update bios on gigabyte in mind as you get ready for this task.
| Item | Description |
|---|---|
| USB Flash Drive | A USB flash drive formatted to FAT32 is required to store the BIOS update file. |
| BIOS Update File | You’ll need to download the latest BIOS version for your specific GIGABYTE motherboard model from the official GIGABYTE website. |
| BIOS Access | You’ll need to be able to access the BIOS menu on your GIGABYTE motherboard, typically done by pressing the “Delete”, “F2”, or “F10” key during boot. |
Having everything you need to update your GIGABYTE motherboard’s BIOS is key. With the requirements for updating gigabyte bios and needed items ready, your update will be a success.
Downloading the Latest BIOS Version
The first step in updating your Gigabyte motherboard’s BIOS is to find and download the newest version. This is key to ensure your firmware is up-to-date. It addresses bugs, security flaws, and can make your system better since your last update.
To find the latest BIOS for your Gigabyte motherboard, visit the Gigabyte website. Go to your motherboard’s product page under the Gigabyte link. Then, look for the “Support” section and choose the “BIOS” tab. You’ll see all the available BIOS versions for your board.
When picking the newest BIOS version, steer clear of “Beta” or “Experimental” ones. They might have new features or fixes that haven’t been fully tested.
This could cause problems for most users. Opt for the newest “Stable” or “Official” version. They’ve been widely tested and are the safest choice.
After choosing the right BIOS file, download it to your PC. This file is what you’ll use in the next steps to update the BIOS. Make sure to save it in a spot where you can easily find it on your computer.
Following these instructions will guarantee your Gigabyte motherboard has the most recent BIOS version. This is crucial for a smooth BIOS update. Now, you’re ready to proceed with confidence.
How to Update BIOS on Gigabyte Motherboard
Step-by-Step Guide
Updating your Gigabyte motherboard’s BIOS is key for top performance. It helps with stability and makes sure it works well with new hardware and software. We’ll guide you through updating your BIOS step by step.
- First, download the newest BIOS version for your motherboard from Gigabyte’s site. Make sure you choose the right model and version for your system.
- Put the BIOS file onto a USB flash drive after downloading. Ensure it’s the biggest file in the folder where you put it.
- Reboot your computer and press the key that takes you to BIOS setup. This key is usually “Delete”, “F2”, or “F10” when your system starts.
- Find the “Q-Flash” or “BIOS Update” part in the BIOS menu.
- Choose the BIOS file from the USB drive. Then, click through the prompts to start the update.
- It’s critical not to stop the BIOS update once it begins. Stopping it could damage your motherboard.
- After the update finishes, your computer will reboot. Check the BIOS menu to see the new version.
Just follow these steps to easily update your Gigabyte motherboard’s BIOS. This lets you use all the latest features, fixes, and improvements.
Always check your motherboard manual or the Gigabyte site for specific guidance. Don’t forget, steps might be a bit different depending on your model.
| Step | Description |
|---|---|
| 1 | Download the latest BIOS version for your Gigabyte motherboard |
| 2 | Extract the BIOS file to a USB flash drive |
| 3 | Enter the BIOS setup during system boot |
| 4 | Navigate to the BIOS update section |
| 5 | Select the BIOS file and follow the on-screen prompts |
| 6 | Do not interrupt the BIOS update process |
| 7 | Verify the new BIOS version after the system restarts |
Updating BIOS via Q-Flash
Want to update your Gigabyte motherboard’s BIOS quickly and easily? Use the Q-Flash tool. This tool enables you to update the BIOS without an operating system. It’s a simple guide on using Q-Flash to update your BIOS.
- Begin by downloading the latest compatible BIOS version from the Gigabyte website.
- Copy the BIOS file to a USB flash drive as the next step.
- Restart your PC. During start-up, press the key (like “Delete” or “F2”) to open the Q-Flash menu.
- In the Q-Flash menu, pick “Update BIOS From Drive”. Select the BIOS file from your USB drive.
- Confirm the update by following the instructions on the screen. Then, wait for the process to finish.
- After the update, your system will restart. Check the BIOS menu to confirm the new version.
The Q-Flash BIOS update lets you update the BIOS on your Gigabyte motherboard easily. You don’t need to navigate through an operating system. It is a straightforward method to keep your firmware current.

Make sure you read and follow the instructions carefully for a smooth BIOS update. Updating the BIOS is crucial for your Gigabyte motherboard’s best performance and compatibility.
Updating BIOS via Gigabyte Server Management Console
If your GIGABYTE motherboard has a BMC, updating the BIOS is easy. You can do it through the Gigabyte Server Management Console. This lets you update the BIOS on your Gigabyte server from far away. You won’t need to be next to the server.
Configuring Network Settings
First, you have to set up the BMC’s network settings. Go into the BIOS and find the “Server Management” area. Here, choose to get the network address from DHCP or set it manually. Saving these changes makes sure your server connects correctly.
Uploading and Flashing BIOS
With the network ready, go to the Gigabyte Server Management Console’s web interface. Log in and head to the “Maintenance” page. Upload the BIOS file and pick which BIOS to update (BIOS1 or BIOS2). Then, start the update. The Gigabyte Server Management Console will lead you through updating your Gigabyte server’s BIOS.
Updating the BIOS with the Gigabyte Server Management Console is great for managing your server from a distance. This is perfect for maintaining your Gigabyte server setup when you can’t be there in person.
Make sure to not interrupt the BIOS update and follow all the instructions closely. This will help prevent problems with your Gigabyte server’s motherboard.
Updating BIOS via Gigabyte GSM CLI Utility
Gigabyte has a special tool for updating BIOS via the command line. It’s called GSM CLI (Gigabyte Server Management Command-Line Interface) utility. This is great for users who like to have more control. It’s perfect for those who know their way around BIOS settings.
Updating BIOS1
Here’s how to update BIOS1 with the GSM CLI utility:
- Power off the system with the GSM CLI.
- Then, run the update command to apply the new BIOS1.
Updating BIOS1 and BIOS2 (Backup)
If you need to update both BIOS1 and BIOS2, use the “update bios backupimg” command. This way, both BIOS images get updated. It’s smart because it keeps a backup image ready in case things go wrong.
- First, power off with the GSM CLI.
- Then, use the “update bios backupimg” command to update both BIOS versions.
Once everything’s updated, turn the system back on. Check to make sure the new BIOS is working. This update method makes sure you’re covered. It updates the backup BIOS along with the main one. So, if there’s a problem, you’re still prepared.
The Gigabyte GSM CLI tool is a great choice for experts. It lets users update their Gigabyte motherboard’s BIOS with ease. You can update just the main BIOS1 or both BIOS1 and BIOS2 for a reliable BIOS management experience.
Post-Update Steps
Congratulations on updating your GIGABYTE motherboard’s BIOS! Now, a few more steps remain. These are key to ensuring your system runs well after the update.
- Head back into the BIOS menu to check the new version. Make sure it’s showing up correctly. This confirms your update was a success.
- Adjust any custom BIOS settings that you had before the update. The update might have reset them to default.
- Make sure to turn back on any special features, like XMP/EXPO. This will help your memory work at its best speed.
- After you set your BIOS configurations right, save and exit the BIOS. This lets your system start normally.
- Now, it’s time to test your system well. Look for any new issues since the update. It’s how you know everything’s running as it should.
Following these steps means your GIGABYTE motherboard is up to date and performing its best. Enjoy the benefits of your update, and stay diligent!
| Step | Action |
|---|---|
| 1 | Re-enter BIOS and verify new BIOS version |
| 2 | Reconfigure any custom BIOS settings |
| 3 | Re-enable XMP/EXPO for correct memory speeds |
| 4 | Save BIOS settings and exit to operating system |
| 5 | Thoroughly test system for any new issues |
Troubleshooting Common Issues
Updating your Gigabyte motherboard’s BIOS is usually easy. Sometimes, you might run into trouble. We’ll look at some tips to help you through these issues and update your BIOS smoothly.
Compatibility Concerns
Getting the right BIOS for your motherboard is key. Using the wrong one can cause problems or make your system stop working. To get the right BIOS version, check your motherboard’s manual or visit the Gigabyte website.
USB Flash Drive Compatibility
The USB flash drive holding the BIOS file must be right. It should be in FAT32 or NTFS format. If it doesn’t work, try a different one.
Interrupted BIOS Update Process
If your system loses power or crashes during the update, it could “brick” your motherboard. To keep this from happening, make sure your power supply is stable. Also, avoid doing anything that might interrupt the update.
Post-Update Boot Failure
Sometimes, your system might not start up after updating the BIOS. This could be because of wrong settings or a bad BIOS file. To fix this, try resetting your BIOS to default. Or, use Q-Flash to reflash the BIOS.
If you face any BIOS update issues, check your motherboard’s manual or reach out to Gigabyte’s support. They offer help and specific steps to fix your problem.
Best Practices and Tips
Updating the BIOS on your Gigabyte motherboard may feel overwhelming. However, with some helpful tips, you can do it smoothly. We will look at important things to consider when flashing your Gigabyte system’s BIOS.
- Download the BIOS file from the official Gigabyte website. This ensures it fits your model and is the newest version.
- Format your USB flash drive to FAT32 and make sure it can hold the BIOS file.
- Don’t stop the BIOS update process, as it might make your motherboard unusable if interrupted.
- Keep a stable power source during the update to avoid power loss problems.
- Check your motherboard’s manual or the Gigabyte website for specific steps or needs for your model.
- Think about making a BIOS backup before you update, just in case you need to go back.
Using these best practices, updating your Gigabyte motherboard’s BIOS will be less risky. Remember, it’s crucial to be patient and pay close attention during the BIOS flash. Slow down and check every step to prevent issues.
Want to unlock new features or improve your system’s performance? Updating the BIOS on your Gigabyte motherboard can help a lot. Just follow the advice and best practices we’ve shared. Soon, you’ll successfully update your BIOS.
Conclusion
In this guide, we explored how to update BIOS on a GIGABYTE motherboard. Now, you can keep your system running at its best. This makes sure your computer is compatible and stable.
Here’s what you need to know. First, grab the right tools and the latest BIOS. Then, update using Q-Flash, Gigabyte Server Management Console, or GSM CLI. Finally, do all the steps needed after updating to make sure it went smoothly.
Updating your GIGABYTE motherboard’s BIOS has many good points. It can increase how well your system works. Also, it helps your computer get along better with new hardware and software. By being current, your GIGABYTE system runs smoothly, giving you a great experience.
FAQ
What is the importance of regularly updating the BIOS on my GIGABYTE motherboard?
Regularly updating the BIOS is crucial on your GIGABYTE motherboard. It keeps your system ready to use new hardware and software. These updates also fix bugs and improve system performance.
What tools and materials do I need to update the BIOS on my GIGABYTE motherboard?
You will need a USB flash drive, the latest BIOS for your motherboard, and access to the BIOS menu. The flash drive must be formatted to FAT32.
How do I download the latest BIOS version for my GIGABYTE motherboard?
Visit the GIGABYTE website and go to your motherboard’s product page. Look for the “Support” section to find available BIOS versions. Pick the latest non-Beta version.
What are the step-by-step instructions to update the BIOS on my GIGABYTE motherboard?
First, save the BIOS file to a USB drive. Then, enter the BIOS menu and find the update or Q-Flash section. Choose the saved BIOS file and follow the screen instructions to finish.
How can I use the GIGABYTE Q-Flash utility to update the BIOS on my motherboard?
Insert the USB drive with the BIOS file. Restart and press the Q-Flash key during startup. Choose the update option and select the BIOS file to start.
How can I update the BIOS on my GIGABYTE motherboard using the Gigabyte Server Management Console?
Start by setting the BMC network settings in the BIOS. Then, log into the Gigabyte Server Management Console web interface. In the “Maintenance” page, select the BIOS file for update.
How can I update the BIOS1 and BIOS2 (backup) images using the Gigabyte GSM CLI utility?
To update BIOS1, shut down using the GSM CLI and run the update command. For both BIOS1 and BIOS2, use the appropriate command to update both images.
What should I do after successfully updating the BIOS on my GIGABYTE motherboard?
After updating, check the BIOS version and adjust settings if needed. Make sure to re-enable XMP/EXPO too. Save the changes and check if the system works fine.
What are some common issues I might encounter when updating the BIOS on my GIGABYTE motherboard?
Updating problems can include a wrong BIOS file, not recognizing the flash drive, update interruptions, and post-update boot failures.
What are some best practices and tips to ensure a successful BIOS update on my GIGABYTE motherboard?
Download BIOS updates only from GIGABYTE’s official site. Format the USB drive correctly. Ensure the update process doesn’t get interrupted. Have a stable power source and backup the BIOS first.